Create Clocks (.clk)
SMP players include some default clocks for you to use. If you can't find any suitable one, CAYIN also provides a tool for you to create your own clock. Right now, you can only create clocks via the Windows version of Skin Editor. Clocks can't be edited directly on the SMP's online management user interface.
Create a Clock (.clk)
You can use CAYIN Skin Editor to create your personal clock file (.clk).
- Go to Template > Manage Clock Templates.

- Click New and you will see a pop-up window. You can name your clock, and choose the clock type and size (how many resolutions you want to create for your clock) here. Click OK to continue.
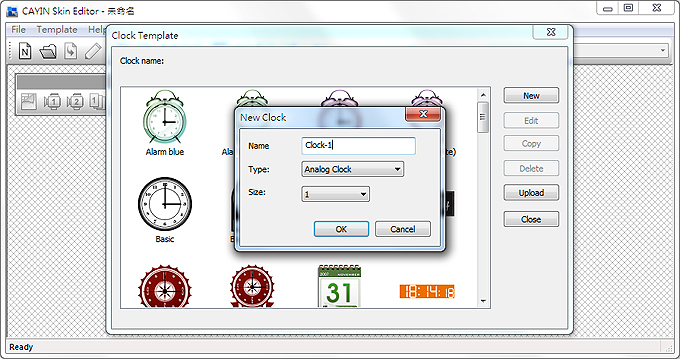
The following steps will be different based on the clock type you choose. Please refer to the configurations of these three clocks respectively.
| Analog Clock | Digital Clock (Image) | Digital Clock (Text) |
|---|---|---|
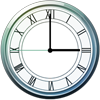 |
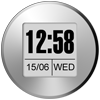 |
 |
Analog Clock:
General Settings
- Select your clock background here. You have to import an image file as your clock background image (clock face). The clock size will be based on the imported background image.
Note
The maximum and minimum dimensions of a clock are 1024 pixels (both width and height) and 50 pixels.
- After importing the background image, you can see the preview on the right hand side of window.
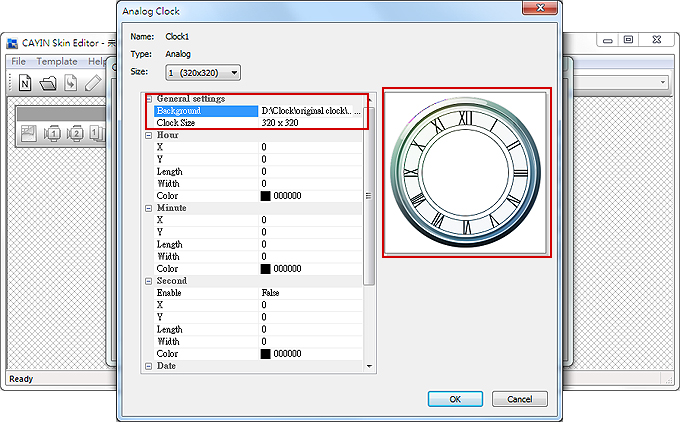
Hour/Minute/Second
Here you can create the hour hand, minute hand and second hand for your clock.
- Input the exact coordinate value (x,y) on the clock face in the hour/minute/second column.
- Configure the length and width of the hour hand, minute hand and second hand for your clock.
- If you want to enable the second hand, please choose True; otherwise, please choose False to disable it.
- Then you can choose colors in Color column.
- Check the preview and fine tune your configuration if required.
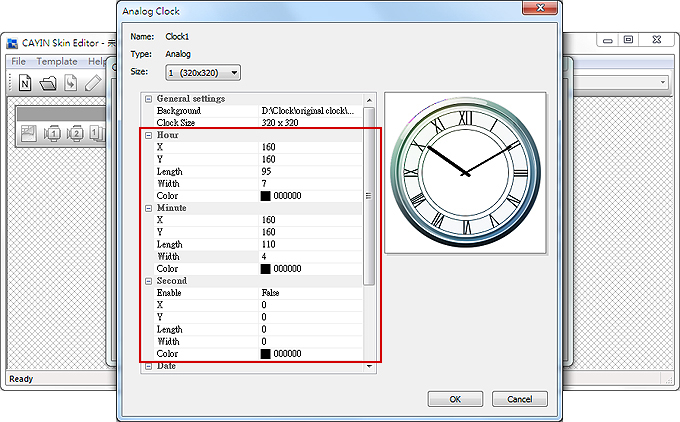
Date
- If you want to show the date, please choose True; otherwise, please choose False to disable and skip this step.
- Input the exact coordinate value (x,y) to decide the location of the date. You can also choose the Font, Font Size and Color here.
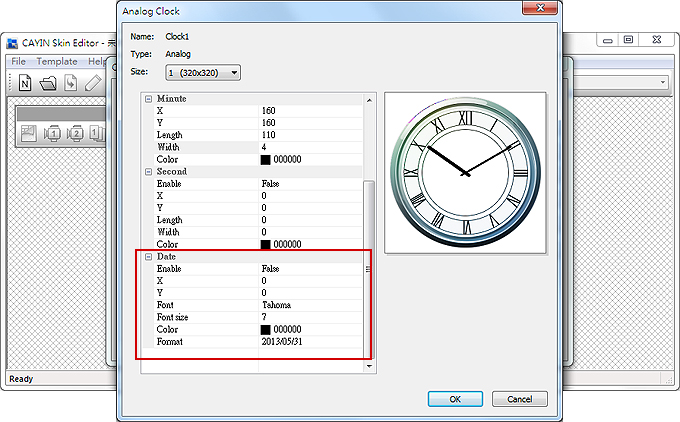
All resolutions
If you need to create more than one resolution for this clock design, please select a different size and repeat the above steps respectively. After finishing setting all the resolutions, please click OK. Then you can see your own personal skin in the Clock Template window.
Digital Clock (Image):
The concept of Digital Clock (image) is using images to compose a clock. Users who choose to make this clock type need to prepare several images (such as number and week day) and import them into Skin Editor.
Note |
|---|
The maximum and minimum dimensions of a clock are 1024 pixels (both width and height) and 50 pixels. |
Here are the images you should have in your hands when you make an Image Digital clock.
| a. Image for clock background (clock face) | 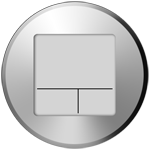 |
| b. Image for hour/minute/second |  |
| c. Image for year/day |  |
| d. Image for month | |
| e. Image for day of week | |
| f. Image for 12 hour |  |
IMPORTANT |
|---|
The image you use for clock should be a serial text, such as "123456789101112" for month or " Sun,Mon,Tue,Wed,Thu,Fri,Sat" for day of week. The width of each set of number or words should be the same. Skin Editor will automatically capture the corresponding text from the text string. |
Note |
|---|
You can create your own image for year/month/day areas separately. For example, you can use "Jan,Feb,Mar,Apr,May,Jun,Jul,Aug,Sep,Oct,Nov,Dec" as your month image. |
General Settings
- Select your clock background here. You have to import an image file as your clock background image (clock face). The clock size will be based on the imported background image.
- After importing the background image, you can see the preview on the right hand side of the window. You can also enable the "12/24 mode" function for 12 hour or 24 hour clock.
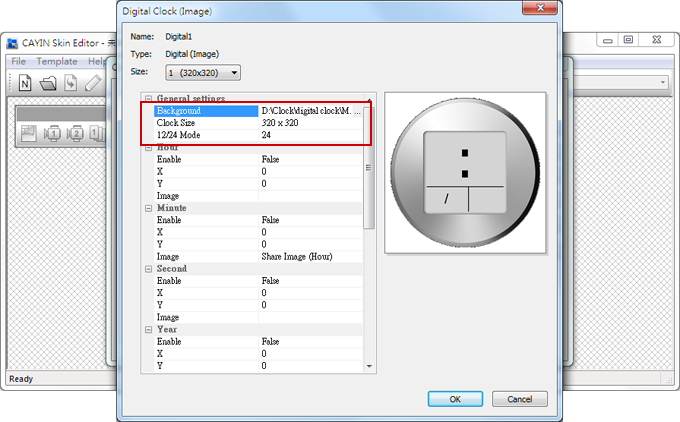
Hour/Minute/Second
Here you can create the hour, minute and second of your clock.
- Enable hour/minute/second columns and input the exact coordinate value (x,y).
- Import the prepared image separately in image columns under hour/minute/second.
- Choose True if you want to show seconds in your clock; otherwise, please choose False to disable this function.
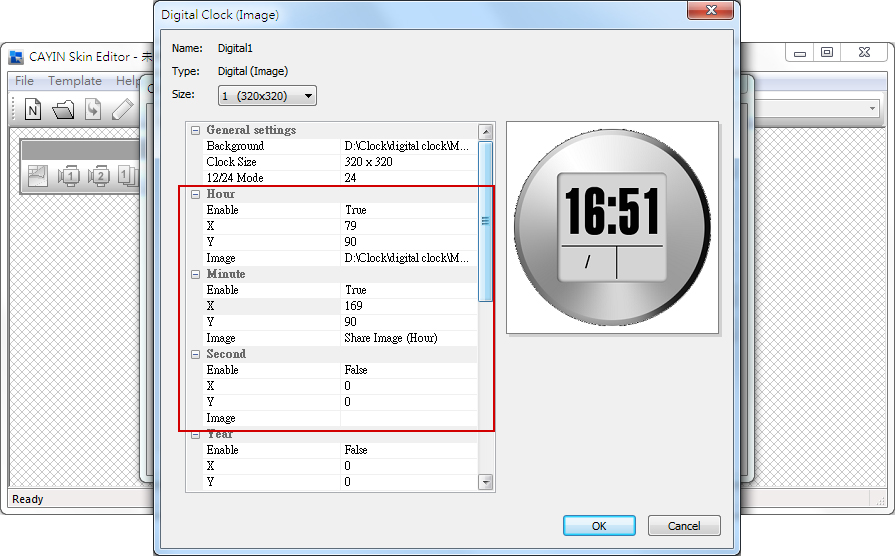
Year/Month/Day/Day of Week
- Please follow the same process to import images in year/month/day and day of week columns.
- Then you can choose to enable AM/PM function and import the image to this column.
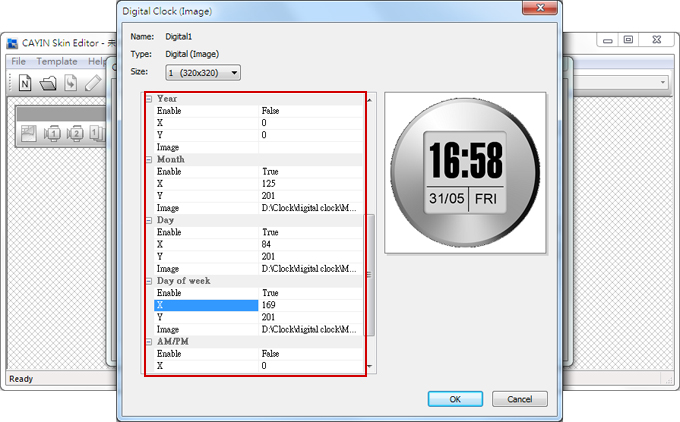
- Check the preview and fine tune your configuration if required.
All resolutions
If you need to create more than one resolution for this clock design, please select a different size and repeat the above steps respectively. After finishing setting all the resolutions, please click OK. Then you can see your own personal skin in the Clock Template window.
Digital Clock (Text):
General Settings
- Select your clock background here. Please note you have to import an image file as your clock background image. If you do not want any background image, please import a white image here. The clock size will automatically show after you import the background image.
Note
Please import one pre-designed background image into Skin Editor when you make a text digital clock.
- After importing the background image, you can see the preview on the right hand side of the window. You can also enable the 12 Hour indicate function. If you want to enable this function, please select True; otherwise choose False.
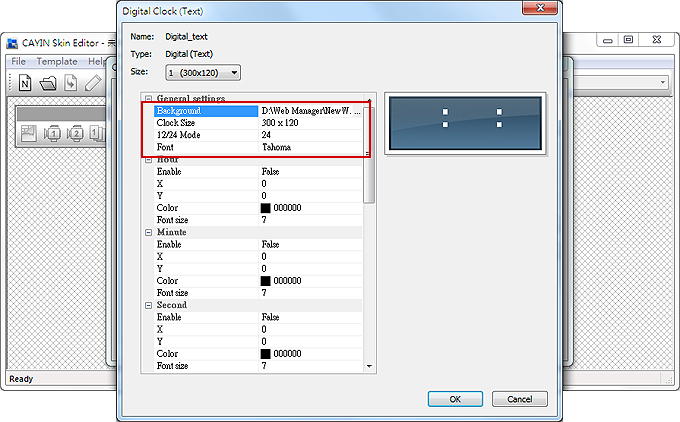
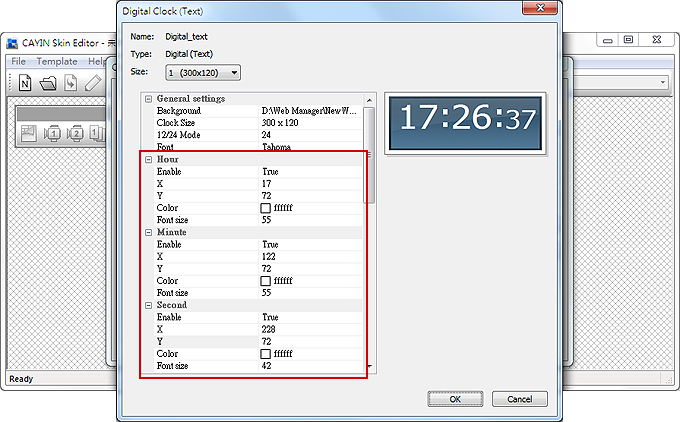
Hour/Minute/Second
- Enable hour/minute/second columns and input the exact coordinate value (x,y).
- You can also choose color and font size in Color and Font Size columns.
- If you want to enable the second area, please choose True; otherwise, please choose False to disable it.
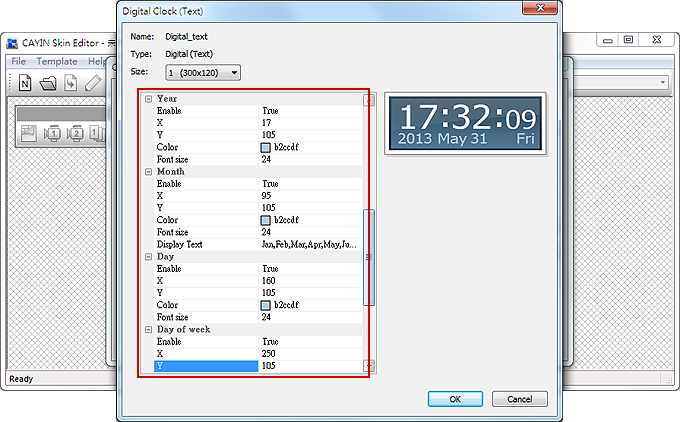
Year/Month/Day/Day of Week
- Enable Year/Month/Day/Day of Week columns and input the exact coordinate value (x,y).
- In month/day of week and AM/PM columns, you can enter the actual wording that will display on your clock. If you want to enable AM/PM function, please choose True; otherwise please choose False to disable it.
 Note
NotePlease make sure to enter a serial text and a comma, ",", between each word when you input text in month/day of week and AM/PM columns. For example, please enter "Jan,Feb,Mar,Apr,May,Jun,Jul,Aug,Sep,Oct,Nov,Dec" but NOT only "Feb" into the display text area in month column. The system will automatically capture the corresponding text from the text string.
- Check the preview and fine tune your configuration if required.
All resolutions
If you need to create more than one resolution for this clock design, please select a different size and repeat the above steps respectively. After finishing setting all the resolutions, please click OK. Then you can see your own personal skin in the Clock Template window.
Upload a Clock to Skin Editor
You can download new Clock templates (.clk) from SMP's Online Resource and upload them into Skin Editor to modify by yourself.
- Download a .clk file to your PC, or have any existing .clk file at hand.
- Open CAYIN Skin Editor and go to Template > Manage Clock Templates and click the Import button.
- Choose the skin you want to upload and click Open. Now you can find the uploaded clock and make any changes on it.