Edit Skin (Template)
A skin is displayed as a background on which video, image, and ticker play. After you create a skin file, you can upload it to SMP players and adopt it into your contents. CAYIN provides two methods for you to edit a skin (template):
- Edit skin online: You can edit skin directly on SMP's management user interface.
- Edit skin offline: You can install a Windows® tool, Skin Editor, and create your own skin offline on your computer.
In this section, we will introduce the usage of the Windows® tool, Skin Editor.
- Install Skin Editor in your computer
- Create a skin (.csk)
- Upload a skin to Skin Editor
- Edit a skin in skin template
Install Skin Editor in Your Computer
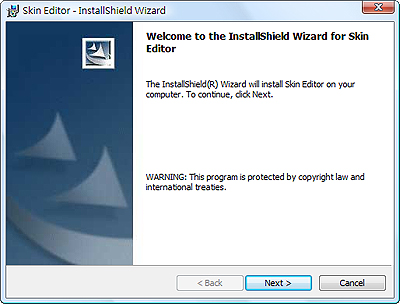
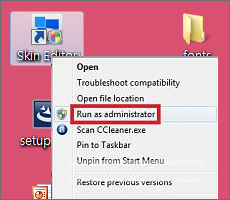
After successful installation, you can find the program shortcut of Skin Editor on Desktop or Program menu.
Note |
|---|
 |
Create a Skin (.csk)
- Execute the program Skin Editor in Start menu or on your desktop; then you will see the editing panel. Here are introductions of the toolbar.
Icon Name Introduction 
Create a new skin Add a new skin 
Open skin from csk file Open created skin 
Publish skin Save your skin and publish .csk file 
Skin settings Configure skin properties, such as name, model, and resolution 
Zoom in/Zoom out Enlarge or reduce the view of a skin 
1:1 Display the skin in the actual size 
Fit Fit a skin to the screen 
Align Top/ Bottom/ Left/ Right Arrange selected zones to align top, bottom, left or right with each other 
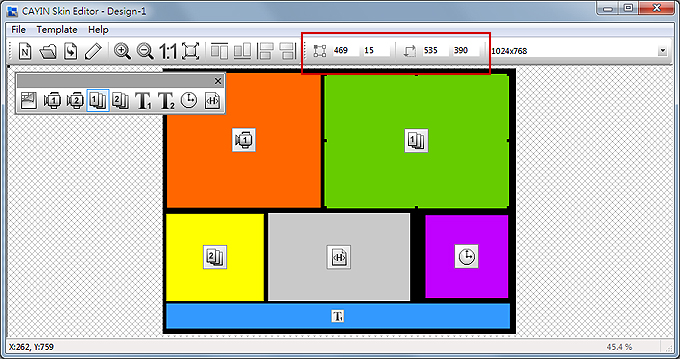
Position Adjust the coordinate value of the upper left corner of the selected zone 
Width/Height Adjust the size of each zone you add in the skin 
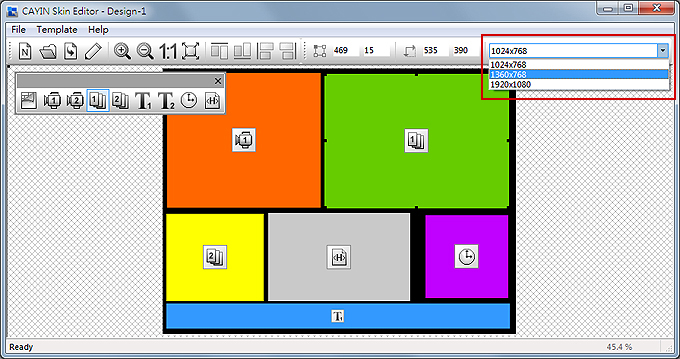
Resolution drop down menu Choose different resolutions of the skin. Please note that you can only see those resolutions you already configure in skin settings. - You can prepare at least one JPEG image file as the background image or you can choose single color background.
- Go to File > Create New Skin or just click the icon
 in toolbar. Then you will see a pop- up window.

- Please choose a product model. If you choose All, you can create a skin file for all resolutions supported by SMP series.

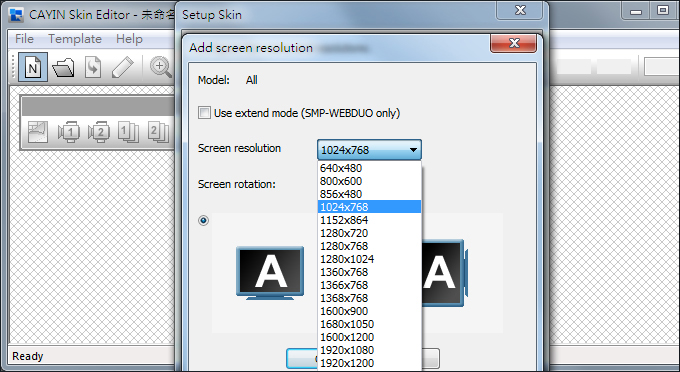
- Select your skin resolutions and screen rotation. Please choose and save one resolution at a time if you want to create several skin resolutions. You can also select User define to configure your own resolution. Click OK to proceed.
Note
The skin only applies to those resolutions which you pre-edit by CAYIN Skin Editor. So, we suggest you upload all possible resolutions, in case you need to use the skin in different situations.
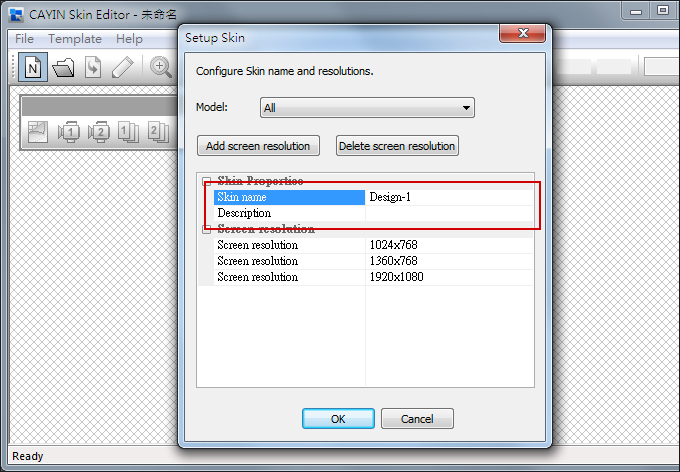
- Now name your skin and description (optional). Click OK to proceed.
- You can see an area that matches the resolution you choose.
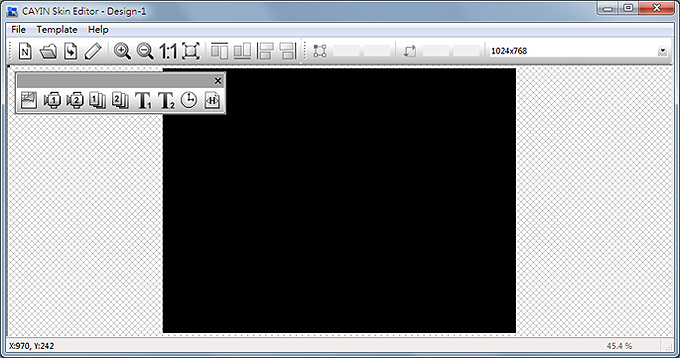
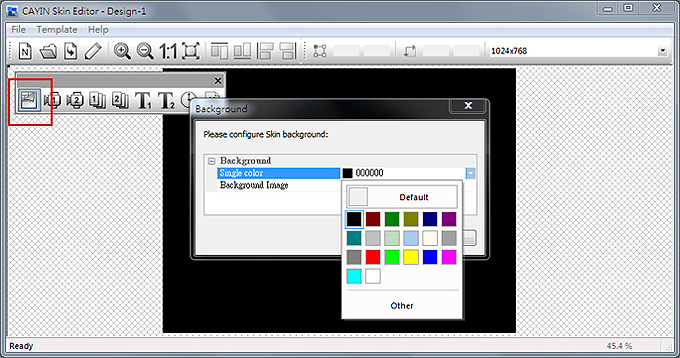
- You can change the background color of your skin. Just click on the background icon
 on the tool bar and choose the color you want. You can also import your own background image.
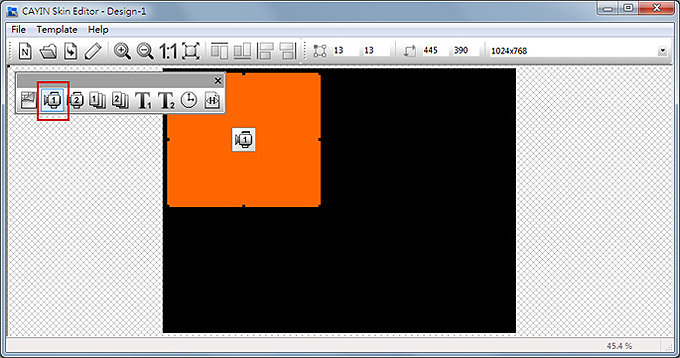
- Now, please choose those zones you want to edit. For example, if you want to edit a multimedia zone first, please click on the multimedia icon
 on the toolbar and drag the area size you want for the multimedia zone. When it is done, you can see an area with a multimedia icon in it. This can help you identify the type of each area.
Note
on the toolbar and drag the area size you want for the multimedia zone. When it is done, you can see an area with a multimedia icon in it. This can help you identify the type of each area.
NoteCAYIN's Skin Editor will detect which kinds of zones you can include to your skin file. Also, the Skin Editor will automatically gray out those elements you cannot use.
NoteFor Multimedia, Image Slide Show, and Ticker areas, you cannot start the setting with area 2. You must finish configuring area 1 before you can move on to area 2.
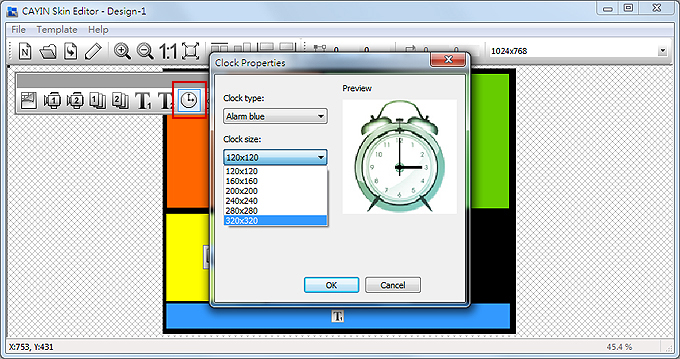
- When you configure the clock area, you can only adjust the size of the clock area by selecting a pre-defined size, and place it in any position you want. There are two types of clocks: analog and digital.
- If you want to adjust the size of each element, just click the element you want to adjust and move your cursor to the edge of that element. When you see the arrow
 , please left click your mouse and drag to the size you want. You can also type the coordinate value on the columns on the upper side toolbar
  to change the skin size. If you want to move a specific zone, please just drag and drop the zone to the place you want.
- If you upload more than one resolution for your skin, please select other resolutions from the upper side drop down menu and start over the configuration process.
 Note
NoteYou may discover in some zoom ratio, the quality of background image seems not good. The image preview window is for reference only. It will not affect the final quality of published skin file.
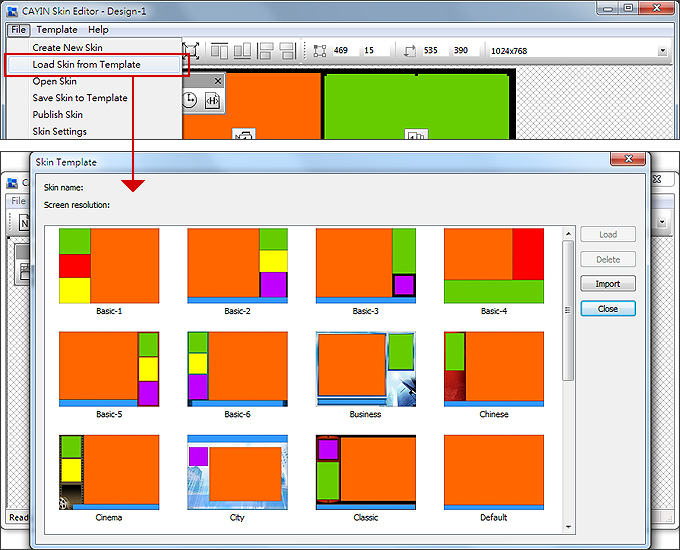
- If you would like to save the unfinished skin temporarily, please go to File > Save Skin to Template. Then you can save the skin in the Template library, and come back to edit it again later by using Load Skin from Template.
- After completing all configurations, please remember to save your skin file (.csk) by clicking Publish Skin icon
 on the tool bar or go to File > Publish Skin. You can upload the .csk file into an SMP player or CMS server by Web Manager later.

Upload a Skin to Skin Editor
You can export skins (.csk) from SMP player's Web Manager or download new skin file (.csk) from SMP's Online Resource . After having the .csk file, you can easily upload a skin into Skin Editor to modify by yourself.
- Download a .csk file to your PC, or have any existing .csk file at hand.
- Open CAYIN Skin Editor and go to Template > Manage Skin Template and click the Import button. Choose the skin you want to import and click Open.
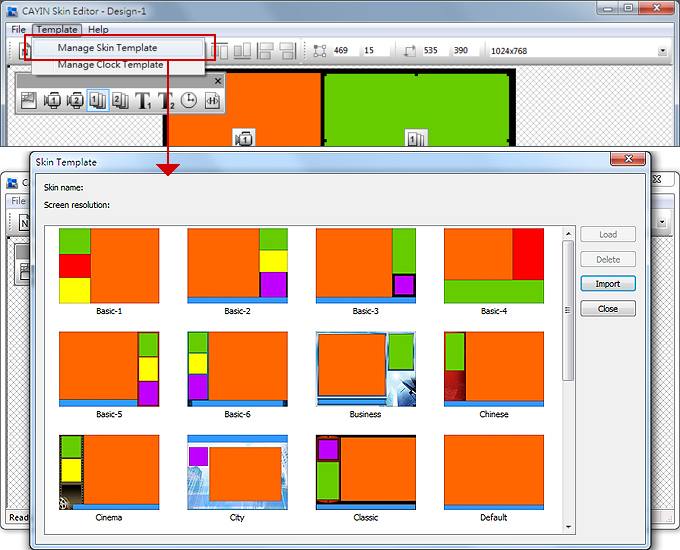
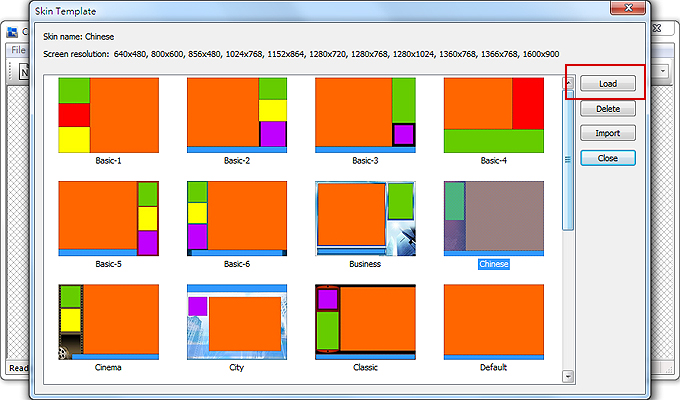
- Now you can find the imported skin file stored in Skin Template. Choose this skin and click Load. Then you can further edit this skin.
Edit a Skin in Skin Template
Skin Editor preloads many skins in Skin Template for your further editing. You can also save your own skin to Skin Template. Please follow steps below to reload and adjust skin settings.
Note |
|---|
You have to save your skin in Skin Template first via File > Save skin to template, or your skin won't show up in Skin Template for any further modification. |
- Open the CAYIN Skin Editor.
- Go to File > Load Skin from Template. You will see a pop-up menu.

- Choose the skin you want to adjust and click Load.
- Now you can make changes to your skin file.