Service Information
You can configure settings of web services in SYSTEM > Service page.
Media Folder
In this section, you can set share mode of Media Folder (on network neighborhood) for CMS users.
| Do not share Media folder | The folder will not be shared. |
|---|---|
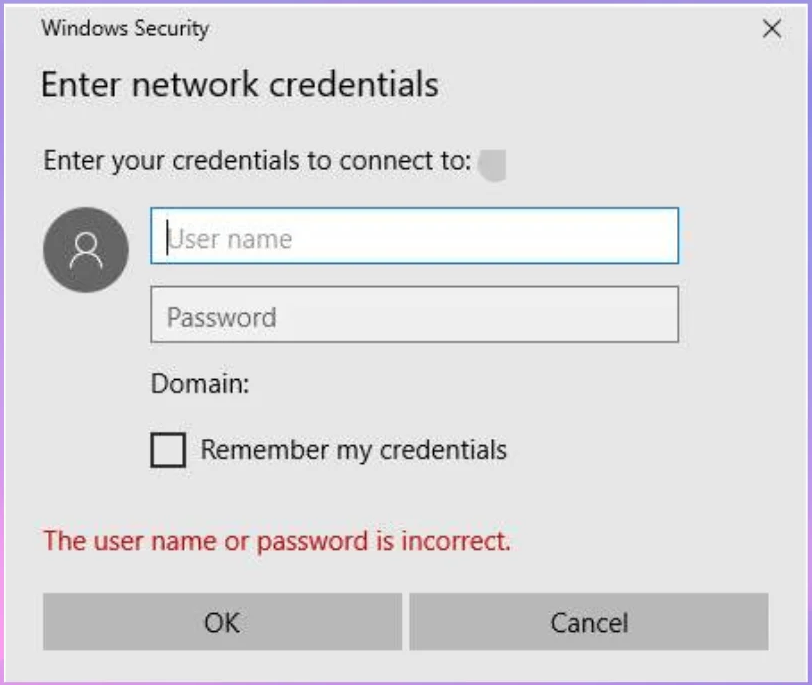
| Share mode | Select Share mode if you allow open access to all users. In this mode, users can access the folder without username and password. When the user connects to CMS using Samba on a computer, the "Enter Network Credentials" window appears.  The user can enter the Microsoft account password for Windows to authenticate or use the CMS account credentials to authenticate. |
| User mode | In User mode, users need to enter username and password to access the folder. If you only want to allow access from an authorized user, enable this function. Please configure username and password at ACCESS > Account page. |
| The access is only allowed from IP address | To allow access from a particular IP address or subnet, enter the IP address or partial IP address, e.g. type 172.16.0.1 to allow access only from this IP address, or type 172.16.0. to allow access from all computers in this subnet. |
FTP
In this section, you can set access rights of Media Folder (on network neighborhood) via FTP for CMS users.
| Disable FTP | The folder will not be shared via FTP. |
|---|---|
| Enable FTP | The folder will be shared via FTP. Please configure username and password at ACCESS > Account page. |
| The access is only allowed from IP address | To allow access from a particular IP address or subnet, enter the IP address or partial IP address, e.g. type 172.16.0.1 to allow access only from this IP address, or type 172.16.0. to allow access from all computers in this subnet. |
NTP
You can enable NTP function to synchronize the clocks of server from an NTP server automatically (e.g., time.nist.gov). CMS will update the system time from NTP server every 7 days or when the system restarts.
- Click Enable NTP service, and enter the address of the NTP server address.
- Click Update now to update the time immediately. You can also click Test to verify the availability of the NTP server.
Enable NTP server in this CMS: CMS server can be an NTP server to players when this option is checked. You can set CMS server as player’s NTP server to synchronize date/time.
Note |
|---|
Initiation might take five minutes when you enable the NTP service. |
Port and Security
You can modify TCP/IP service port number for different services here:
| TCP/IP service port for Web Manager | The default port number is 80 and we suggest you keep it that way. If you have good reasons to change the port number, please do remember the new one, otherwise you will not be able to open CMS’ user interface.
You can change the service port number according to your network environment. We recommend using a port number greater than 1024 to avoid conflicts with existing services. After changing the port number, you need to add the port number to the end of the URL when connecting to the Web Manager (for example: http://172.16.0.100:8080). |
|---|---|
| Enable secure connections (HTTPS) | If you want to ensure your internet access is secure, enable this function to use HTTPS. The default port number is 443.
You can change the service port number according to your network environment. We recommend using a port number greater than 1024 to avoid conflicts with existing services. After changing the port number, you need to add the port number to the end of the URL when connecting to the Web Manager. |
| Account Lockout | You can set the time interval in seconds and maximum login attempts to make sure the account will be blocked automatically after failed login attempts. |
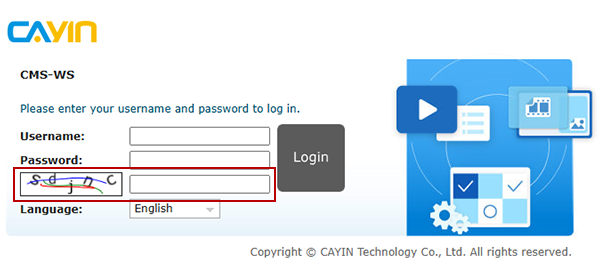
| Verification Code | You can enable verification code to add extra account security.
 |
| Log out all Signage Assistant devices: | You can click the Execute button to disconnect all Signage Assistant devices from this server. |
Note |
|---|
|
Streaming
You can enable the maximum bitrate for streaming media files. There are two options:
- Convert media files to 720p videos and limit the max bitrate at 2500 Kbps.
- Convert media files to 1080p videos and limit the max bitrate at 4000 Kbps.
Transcoded media files will not be transcoded again even though you change the streaming setting. The transcoded .ts and .m3u8 files will be kept.
You can also click the button to clear streaming cache for 720p or 1080p respectively.
Back to Top
Active Directory
- Check the option to enable Active Directory services.
- Fill in the following Active Directory server information:
Domain NetBIOS Name Enter the unique domain name, for example: CAYINTECH. AD Server Name Enter the AD server name. Domain Name Enter the domain name, for example: cayintech.com. Domain Admin Username & Password Enter the domain administrator’s username and password to ensure access to the AD server information. Protocol Choose either LDAP or LDAPS. - Click Choose File, select the certificate file, and then click Upload.
- After filling in the information, you can click the Test button to ensure a successful connection.
- Click Account Settings to navigate to the Access > Account page to manage accounts.
- Click Save. Remember that every time you click Save, you need to enter your username and password.
- After successfully connecting to the AD server, go to the Access > Account page, where you will see two types of user accounts:
- Local Users: Accounts created on the CMS server.
- Domain Users: Accounts managed by the AD server. Any changes to account information must be made on the AD server.
NOTE |
|---|
The system is set by default to synchronize account information between the CMS and the AD server every 15 minutes. Additionally, whenever settings are changed and the Save button is clicked, the CMS and AD server will synchronize immediately. |