Installation
In this section, we will walk you through the steps to install Ubuntu Linux and CMS software on your server.
- Installing Ubuntu – Physical Server
- Installing Ubuntu – Virtual Machine (VM)
- Installing CMS Software
Installing Ubuntu Linux – Physical Server
PLEASE NOTE THAT BASIC LINUX KNOWLEDGE AND EXPERIENCE ARE REQUIRED TO PROCEED WITH THE FOLLOWING STEPS.
PLEASE NOTE THAT IF YOU INSTALL THE UBUNTU LINUX OPERATING SYSTEM USING THIS METHOD, THE UBUNTU LINUX INSTALLATION WILL OVERWRITE THE SERVER'S ORIGINAL OPERATING SYSTEM (SUCH AS WINDOWS).
Preparing for the Installation
- Download Ubuntu Linux from the following URL: http://releases.ubuntu.com/22.04/
Server install image: ubuntu-[xx.xx.x]-live-server-amd64.iso
NOTEPlease be sure to download the software, "Server install image", and NOT the "Desktop image".
Also, make sure to download the current version, which is version 22.04.

- Clone the iso file to a DVD or a USB flash drive as a bootable device.
- DVD: Use a DVD burner software to clone the Ubuntu iso file to a DVD and make the DVD bootable.
- USB flash drive: Use third party software (e.g. Rufus, https://rufus.ie/) to create a bootable drive with the Ubuntu iso file.
- Please make sure your CMS server is connecting to the Internet.
Install Ubuntu 64 bits 22.04 LTS
Please follow the instructions to install the OS on an x86 computer or server. Please note the instructions are based on Ubuntu 22.04.2. Steps may vary depending on the software version.
NOTE |
|---|
Before installation, please make sure to verify that the Ubuntu version is 22.04. |
- Boot from install media
Please insert a flash drive or a disc containing Ubuntu installer into the USB port or the DVD drive.

Then, select Install Ubuntu Server and press enter to install.

Most computers will automatically boot from USB or DVD, though in some cases this is disabled to improve boot times. If you don't see the boot message and the Welcome screen which should appear after it, you will need to set your computer to boot from the install media.
There should be an on-screen message when the computer starts telling you what key to press for settings or a boot menu. Depending on the manufacturer, this could be Escape, F2, F10 or F12. Simply restart your computer and hold down this key until the boot menu appears; then, select the drive with the Ubuntu install media.
- Choose your language
You will see a language menu after the boot messages appear. Use the Up, Down, and Enter keys to select a language of the installation user interface.

- Continue without updating
You will see the currently running version of the installer. Please select Continue without updating, and press ENTER. Otherwise, CMS-SE may not function normally after unexpected Ubuntu updates.

- Configure the keyboard
You need to configure your keyboard before you can type anything in. There are two ways for you to configure the keyboard:
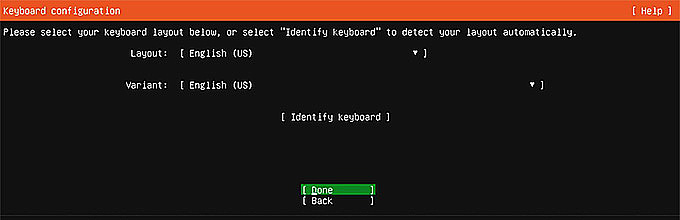
Method 1: Select manually
Please click the drop-down arrow to select a layout and a variant of the keyboard.
Method 2: Detect automatically
You can try to have your keyboard layout detected. Select Identify keyboard to start the detection.
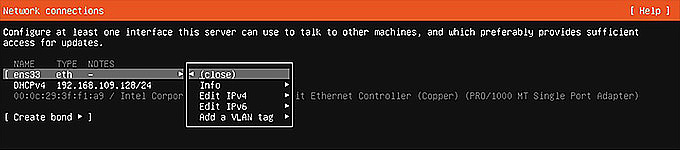
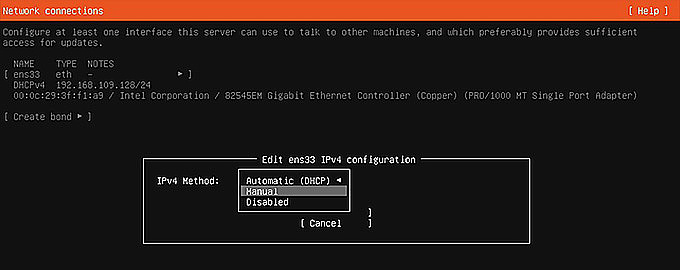
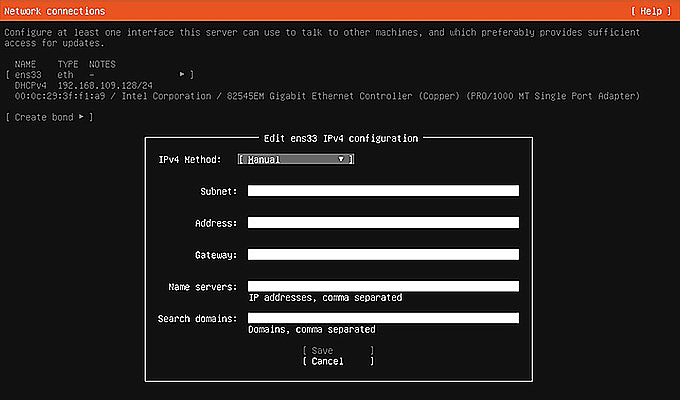
- Configure network connections
Please configure at least one interface this server can use to talk to other machines. The system configures the network settings using DHCP by default. If you wish to use static IP, please click the drop-down arrow, and select Manual to configure by yourself.
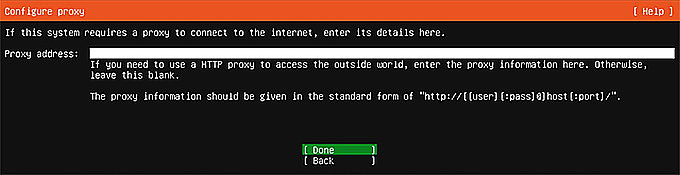
- Configure proxy
If you need to use a HTTP proxy to access the outside world, please enter the proxy information here. Otherwise, leave this blank and press the ENTER key to continue setting.
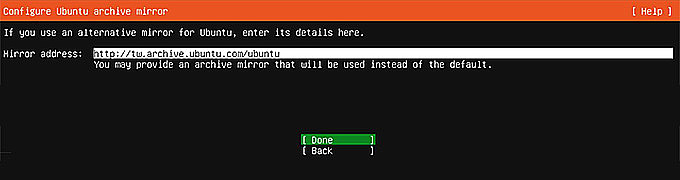
- Configure Ubuntu archive mirror
If you use an alternative mirror for Ubuntu, enter its details here.
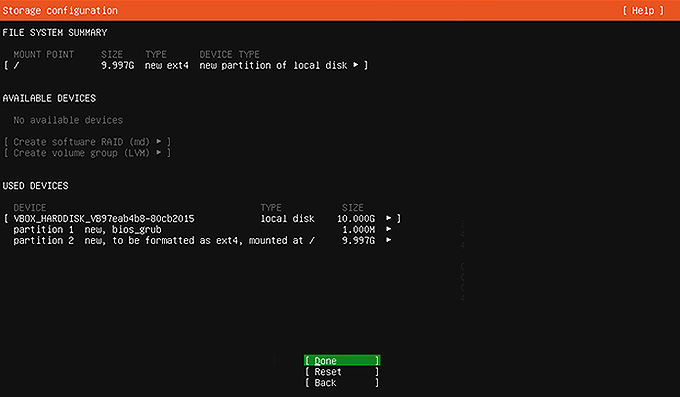
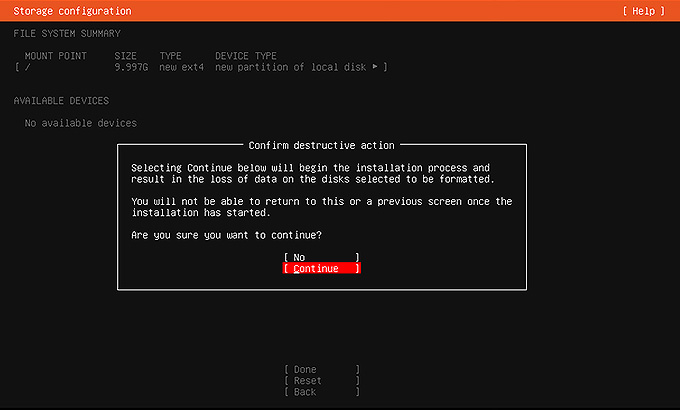
- Configure storage
The installer will guide you through partitioning the hard drive.
Please note: Do NOT enable the function: Set up this disk as an LVM group.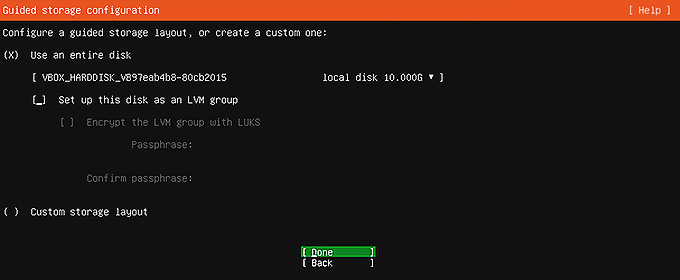
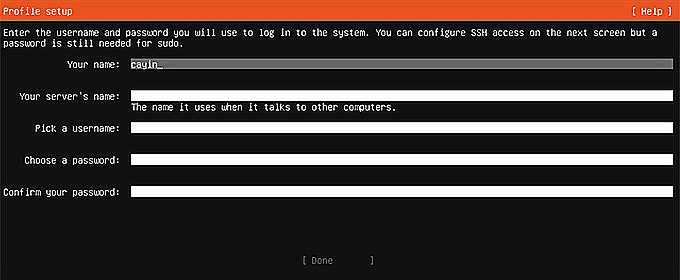
- Set up Profile
Enter the username and password you will use to log into the system.
NotePlease avoid using administrator, the reserved accounts of CMS-SE, as the username.
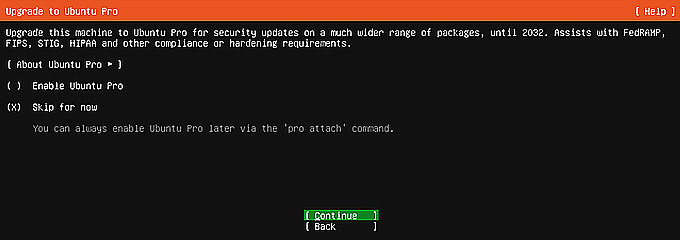
- Upgrade to Ubuntu Pro
You can decide if you want to upgrade to Ubuntu Pro to get security updates for 10 years. If not, you can still enjoy seruity updates for 5 years. Ubuntu Pro is only for personal account, so we choose Skip for now.
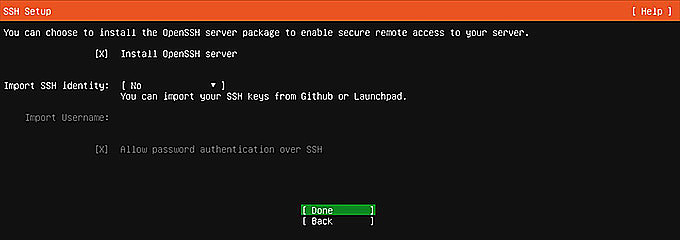
- SSH Setup
We strongly recommend you install OpenSSH server to enable secure remote access to your server.
- Set Server Snaps
Please select or deselect snaps with SPACE.

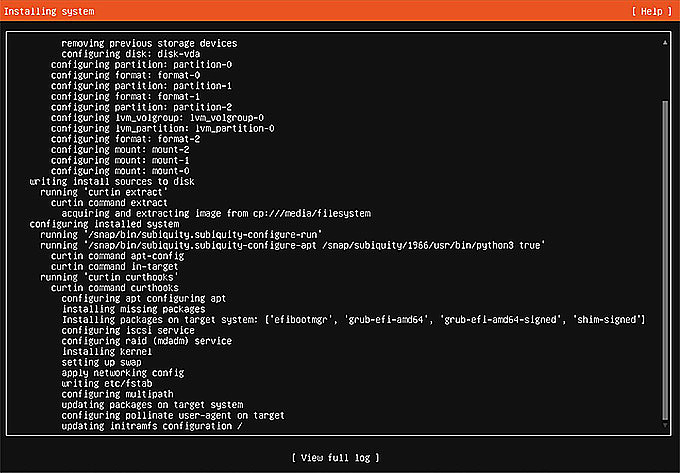
- Start to install
After you complete the above configurations, the system will start to install.
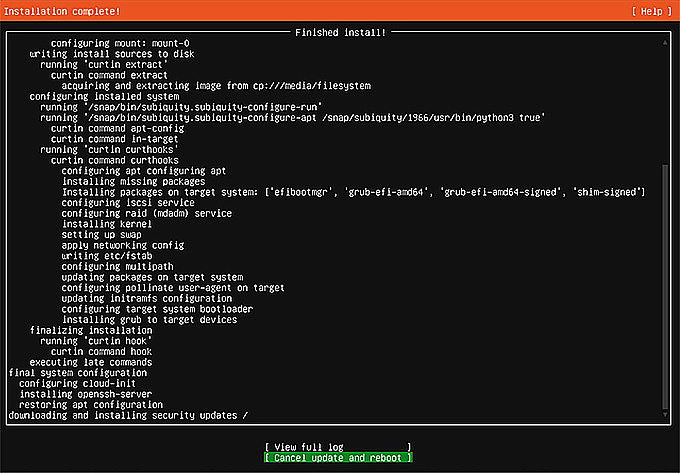
- Finish the installation
When the install is complete, you will see a message like this on the screen. Please DO NOT click Cancel update and reboot until the option becomes Reboot.
Select Reboot.
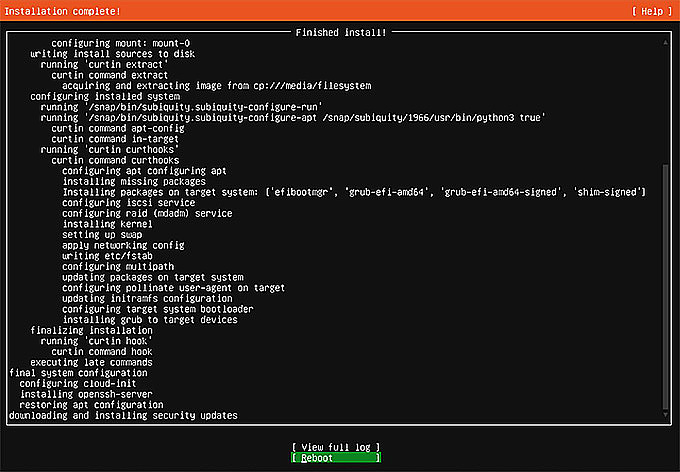
Wait until this screen appears before removing the installation media. Make sure to remove the installation media to avoid reinstalling the system. After removing the installation media, press Enter.

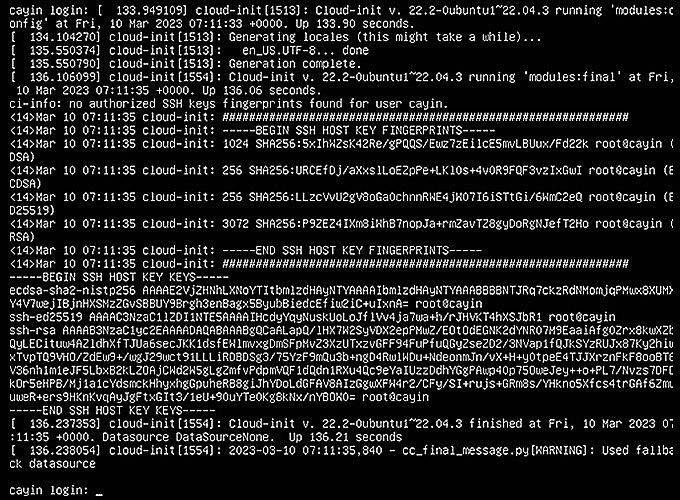
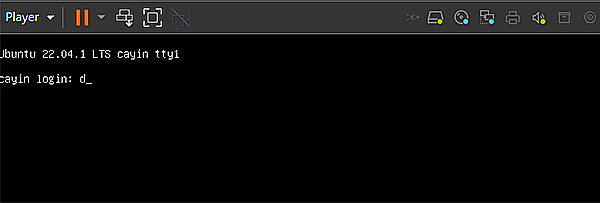
- Log in Ubuntu
Once the installation is complete, log in Ubuntu with the password created during the installation process.
Please proceed to install CMS Software after you have installed the operating system and logged in Ubuntu successfully.
Installing Ubuntu Linux – Virtual Machine (Use VMWare™ as an example)
PLEASE NOTE THAT BASIC LINUX KNOWLEDGE AND EXPERIENCE ARE REQUIRED TO PROCEED WITH THE FOLLOWING STEPS.
Preparing for the Installation
-
Please install VMWare Workstation Player or Workstation Pro in your PC in advance.
- Download Ubuntu Linux from the following URL: http://releases.ubuntu.com/22.04/
Server install image: ubuntu-[xx.xx.x]-live-server-amd64.iso
- Save the Ubuntu Linux file in your PC.
Set up a Virtual Machine and Install Ubuntu 64 bits 22.04 LTS
Please follow the instructions to install the OS on a virtual machine.
- Run VMWare Workstation on your PC and click Create a New Virtual Machine.

- Choose Installer disc image file (iso) and click Browse to select the downloaded Ubuntu Linux file. Then, click Next.

- Enter a new Ubuntu Linux username and password to create an administration account.

- Enter a Virtual Machine’s name and the location to store the VM.

- Specify the VM’s storage size for the Ubuntu Linux System. We recommend you enter at least 512GB or even bigger, which varies according to your media files usage. Then choose Store virtual disk as a single file and click Next.

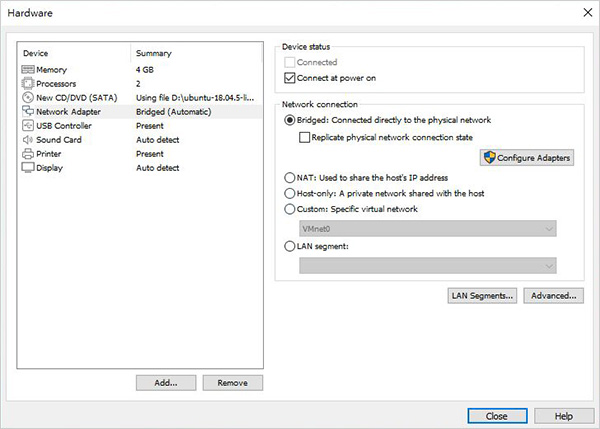
- Click Customize hardware… to change VM’s system settings.

- You can see memory, processor and other settings here. The configurations are dependent on your needs. Please use 4GB RAM at least and set Network Adaptor in Bridged mode to obtain a real IP.
Click Close to return and click Finish to start creating the new virtual machine.
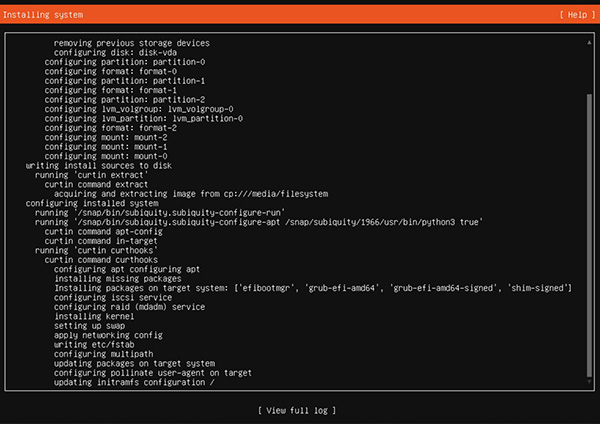
- The VM will start automatically.

- Ubuntu will be installed automatically. The installation process may take 10 to 20 minutes or even longer.
- After installation completes, you can use the username and password that you set in step 3 to log in Ubuntu. After login, please proceed to install CMS Software.
Installing CMS software
You can choose either one of the following methods and proceed accordingly to install CMS software.
NOTE |
|---|
Before installation, please make sure to verify that the CMS software filename is 22.04. |
Method 1: Uploading CMS-SE Installer by SFTP
- Use any SFTP software (e.g. Filezilla or Winscp) to connect to Ubuntu (you must have the IP address) and enter the username and password mentioned above. You must set transfer protocol to SCP.

The IP address will be displayed on the screen after logging into Ubuntu. If the IP address does not appear on the screen after logging in, type ip addr show at the bottom of the Ubuntu interface and press Enter.

Find the eth0 section; the machine's IP address will be displayed there.

- Upload CMS installation file (I_1.0.xxxxx-ubuntu-22.04-amd64.run) to Ubuntu. You can upload the file to any directory but we suggest uploading it to your user home folder.
Note
The file name “I_1.0.xxxxx-ubuntu-22.04-amd64.run” may be changed due to firmware version change.
- Change the CMS installation file’s attribute to 0755. You can either do it on the FTP software or on the command console on Ubuntu.

- Install CMS Software. Open a remote-access program via SSH, such as Putty. Connect to CMS’s console remotely and use the commands in the instructions below to install CMS software via SFTP:
$sudo ./I_1.0.xxxxx-ubuntu-22.04-amd64.run
[sudo] password for your account: <enter your password>

- Press the Enter key to reboot the server after the installation is complete. Then you can log into the Web Manager of CMS in your PC browser.
Method 2: Installing CMS from DVD or USB flash drive
- Install CMS software
Please insert a flash drive or a disc containing CMS-SE installer into the USB port or the DVD drive. Then, use the following commands to install CMS software:
$ sudo mkdir /mnt/cmsse
[sudo] password for your account: <enter your password>
$ sudo mount <your DVD/USB media path> /mnt/cmsse
$ sudo cp /mnt/cmsse/I_1.0.23068-ubuntu-22.04-amd64.run /mnt
$ sudo chmod 755 /mnt/I_1.0.23068-ubuntu-22.04-amd64.run
$ sudo /mnt/I_1.0.23068-ubuntu-22.04-amd64.run
NotePlease replace <your DVD/USB media path> with your real upload path. The file name “I_1.0.23068-ubuntu-22.04-amd64.run” may be changed due to firmware version change.

- Reboot CMS server
Press any key to reboot the server after the installation is complete. Then you can login to the Web Manager of CMS in your PC browser.